Insulation Blower Rental: A Practical Guide to DIY Attic Projects in 2026
Joshua Price
September 8, 2026
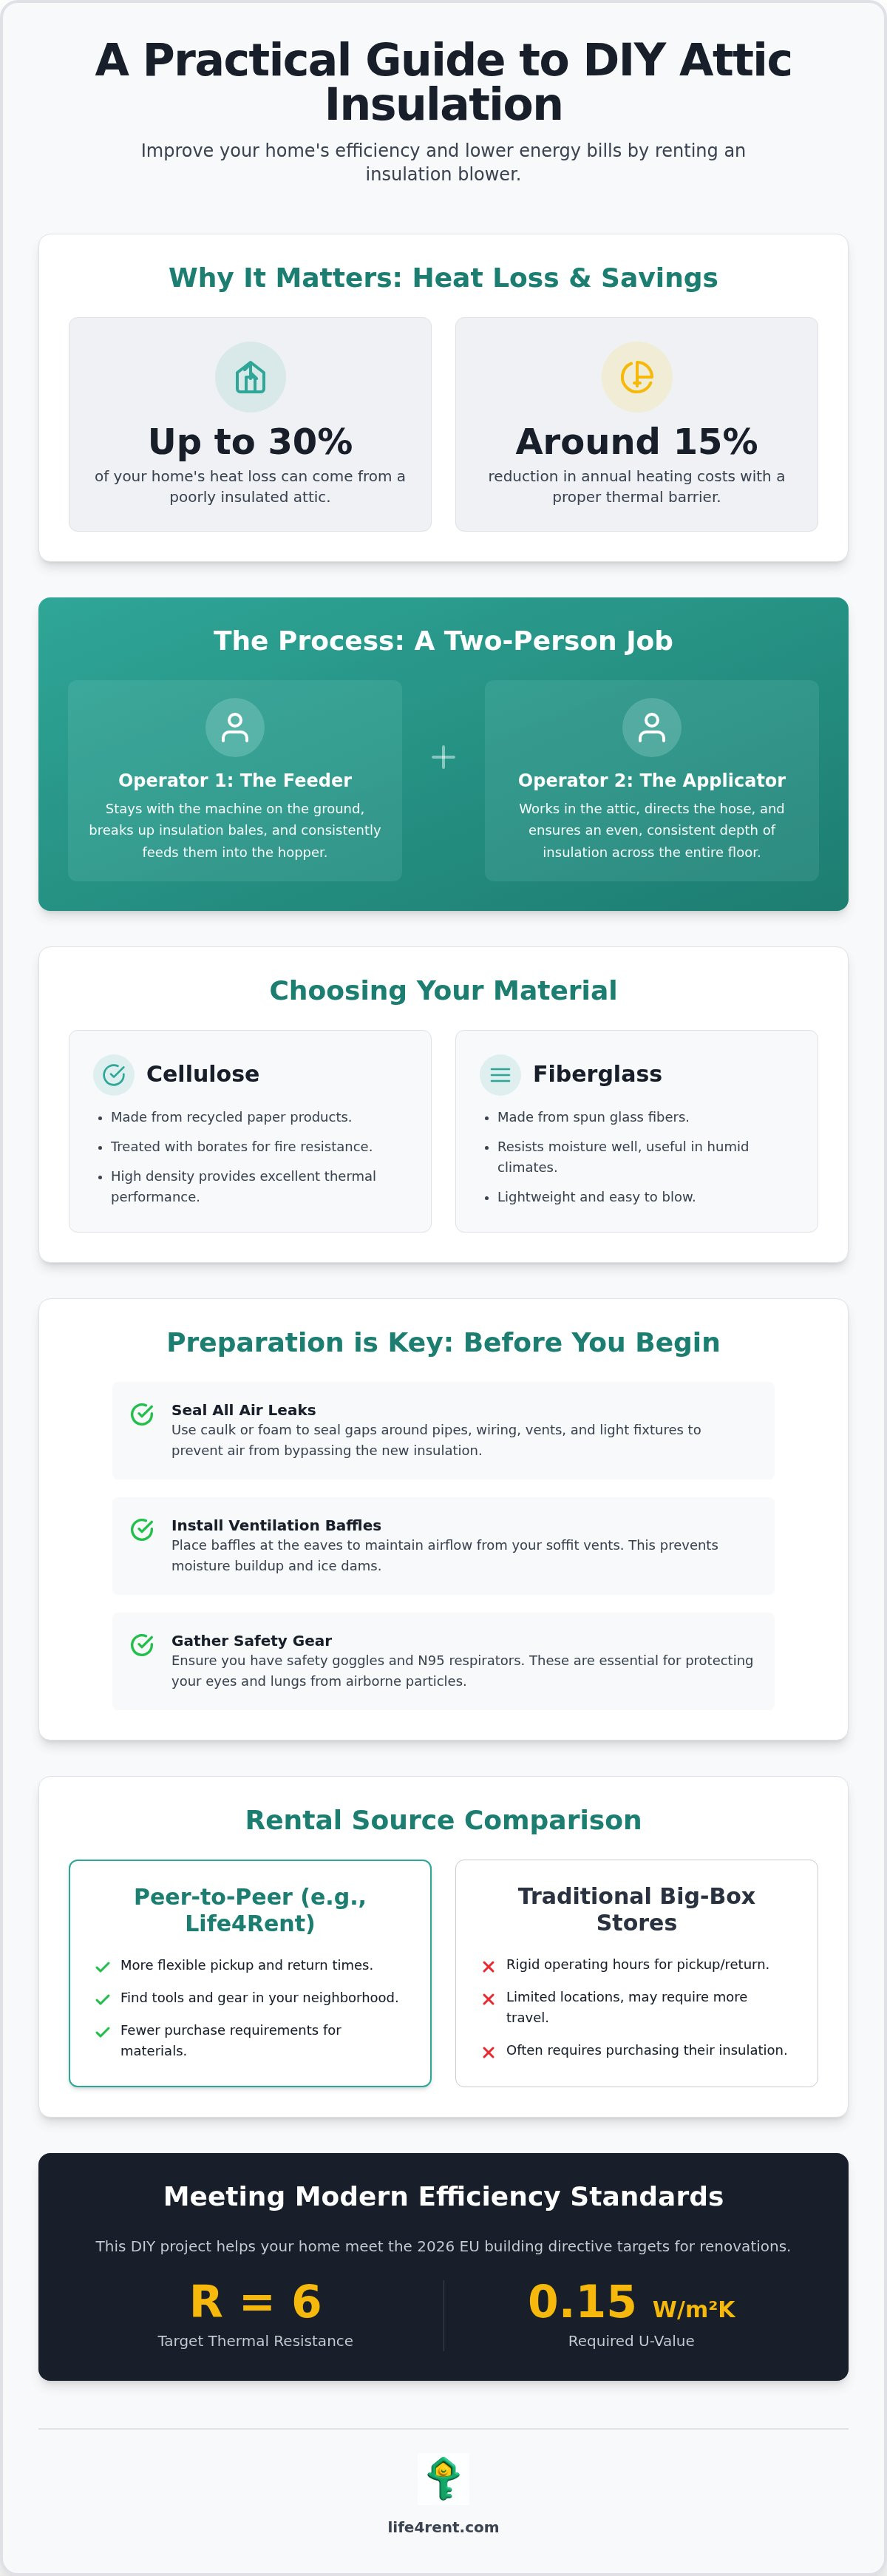
Did you know that a poorly insulated attic can account for up to 30% of your home's heat loss? Most homeowners in Europe feel the sting of rising energy costs, especially with the new EU building directives that took effect in May 2026. An insulation blower rental provides an effective solution to this problem, allowing you to upgrade your home's efficiency without a massive investment.
You'll find that these machines are easier to handle than they look, even if you've never used heavy equipment before. We'll cover how to choose the right blower, handle the materials, and complete the project safely to save money on your bills. Have you considered how much you could save by doing the work yourself? It's a practical way to take control of your maintenance while avoiding high contractor costs.
Modern standards now suggest a thermal resistance of R = 6 for renovations to meet current efficiency goals. We'll look at how to reach these targets using local peer-to-peer platforms like Life4Rent to find tools nearby. You'll learn the steps to prepare your space and operate the machinery so your attic meets the 0.15 W/m²K U-value targets required for 2026 renovations.
How an Insulation Blower Rental Helps You Save on Energy
Heat rises. It's a simple fact of physics that determines how much you pay for comfort every month. Your attic serves as the primary thermal barrier for your home, standing between your living space and the harsh temperatures outside. An insulation blower rental gives you the means to reinforce this barrier with professional-grade precision.
Research from agencies like ADEME suggests that poorly insulated roofs account for up to 30% of heat loss. You can reduce your annual energy costs by roughly 15% with a correctly insulated attic floor. This upgrade helps you meet the target U-value of 0.15 W/m²K required for 2026 renovations across Europe.
Traditional fiberglass batts often leave gaps around wiring, pipes, and irregular joists. These small openings act like open windows, allowing air to escape through the ceiling. Blow-in machines solve this by pulverizing the material and spraying it into every corner.
This process creates a dense, continuous blanket that batts simply can't match. You'll find that a single weekend is usually enough time to complete the entire job. It's a practical way to boost your home's efficiency without a long, drawn-out construction process.
The Practical Benefits of Blow-In Insulation
Loose-fill material settles into irregular spaces without the need for precise measurements. You won't spend hours with a utility knife trying to fit rolls around obstructions or narrow joist gaps. This method ensures a consistent R-value because the material flows into place naturally. Different Building insulation materials, like cellulose or mineral wool, work with these blowers to provide high thermal resistance.
Why DIY Rental Beats Hiring a Contractor
Professional labor costs can easily double the total price of your renovation. You pay for their time, their overhead, and their markups on materials. You keep those funds in your pocket by choosing an insulation blower rental instead. You can ensure every corner is covered to your own standards rather than relying on a third party's speed.
Local peer to peer equipment rental options through Life4Rent make it easier to find high-end tools without the rigid terms found at big-box stores. You get the quality of a pro job at a fraction of the expense. This approach allows you to work at your own pace without the pressure of a contractor's schedule. It's a smart way to modernize your home while keeping your budget intact.
Equipment Overview: How Blow-In Insulation Machines Work
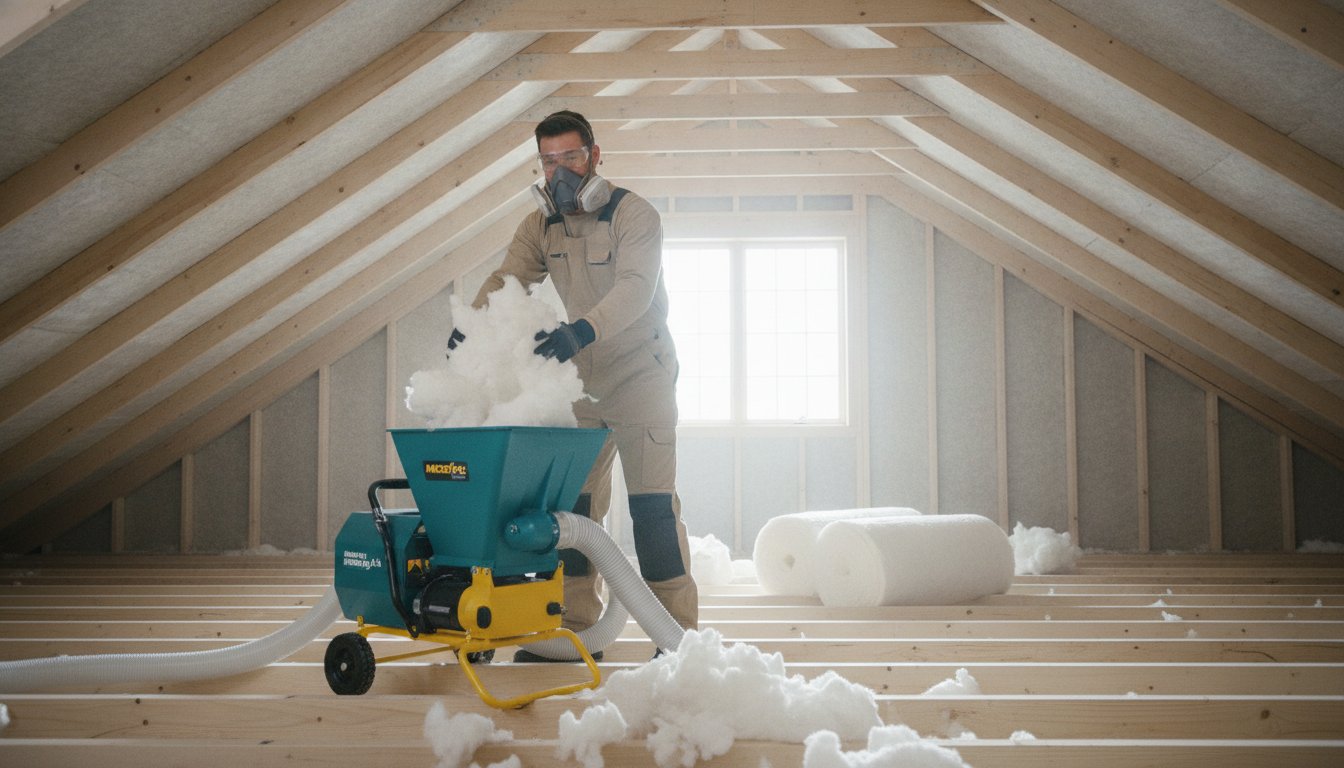
You'll find that an insulation blower rental is quite easy to manage once you know the basic mechanics. These machines are designed to break up compressed insulation and push it through a long hose using a powerful internal fan. A heavy-duty motor drives both the agitators in the hopper and the blower system simultaneously.
Most residential blowers are built for convenience and run on standard 120V household outlets. You won't need specialized power supplies or industrial generators for a typical home attic project. The machine usually stays on the ground, perhaps in your driveway or garage, while the hose extends through a window or door into the attic space.
Success requires a coordinated team of two people. One person stays with the machine to break up the insulation bales and feed them into the hopper. The second person remains in the attic to direct the hose and ensure the material covers the floor at a consistent depth. It's a physical but straightforward process.
Cellulose vs. Fiberglass: Choosing Your Material
Your choice between cellulose and fiberglass is the first major decision for your project. Cellulose is made from recycled paper and is treated with borates to provide fire resistance. It's often preferred for its high density and eco-friendly roots. Fiberglass uses spun glass fibers that resist moisture well, which is helpful in humid environments. You'll need to adjust the air-to-material settings on the machine depending on which material you choose to ensure the flow doesn't clog the hose.
Essential Components of the Rental Kit
A standard rental kit includes several critical parts beyond the blower unit itself. You need to verify that all these items are present before you leave the rental location. Most kits include:
- 50 to 100 feet of flexible hose for maximum reach
- A remote wired control switch to manage the flow from the attic
- Safety goggles and N95 respirators to protect your lungs and eyes
Safety gear is mandatory for any blow-in project. You must wear protection to guard against the dust and fibers that fill the air during the process. If you want to see what equipment is available in your area, you can browse local tool listings to find a kit that includes all these essential components.
Equipment Comparison: Peer-to-Peer vs. Big-Box Store Rentals
Most people head straight to a hardware warehouse when they need an insulation blower rental. You might find, however, that these large retailers often tie the machine to a specific purchase. Many stores only offer the blower for free or at a discount if you buy 10 to 20 bags of their specific insulation brand. This requirement can force you into buying more material than your attic actually needs.
Peer-to-peer platforms like Life4Rent remove these rigid requirements. You can source your materials from any supplier and simply rent the machine that fits your schedule. This flexibility is particularly helpful if you found a deal on materials elsewhere or only need to top up existing insulation. You aren't locked into a single brand's ecosystem just to get the tools you need.
Local rentals also mean you don't have to drive across the city to a massive retail hub. You can often find a neighbor just a few streets away who has the exact gear you need for your project. This proximity saves time on transport and makes returning the heavy equipment much less of a chore. It's a more efficient way to manage the logistics of a weekend DIY project.
The Real Costs of Tool Hire
Daily rates at retail outlets can be misleading. You often face mandatory damage waivers or insurance fees that aren't mentioned in the initial price. Peer-to-peer listings usually show the full cost upfront, so you know exactly what you'll pay. You can find a tool on rent that fits your specific project timeline without worrying about hidden surcharges. This clarity helps you stay within your home improvement budget while accessing high-quality machinery.
Flexibility and Community Support
Tool owners in your community often provide more than just the machine. You might get practical tips on how that specific model handles cellulose compared to fiberglass. Neighbors may even lend you extra accessories like work lights or shop vacs to help with the cleanup. These owners are usually more lenient with return windows if your project takes a few hours longer than expected. The sharing economy keeps these high-quality tools in active use rather than letting them sit idle in a garage.
Attic Preparation: Steps Before You Start Blowing Insulation
Preparation is the most important phase of any attic project. You can't just blow material over a dirty or leaky floor and expect it to work properly. Spend a few hours identifying air leaks around plumbing stacks, chimney flues, and electrical wires. You should seal these with expanding spray foam to prevent warm air from escaping into your new insulation.
Proper airflow is essential for the health of your roof deck. Install attic baffles at the eaves to prevent your new material from blocking the soffit vents. These simple plastic or cardboard channels ensure that fresh air can still circulate from the outside. Without them, you risk moisture buildup and wood rot over time.
Current 2026 standards for renovations suggest a depth of 300mm to reach an R-value of 6. You should use a ruler and a permanent marker to indicate this height on your attic joists every few feet. These marks act as a visual guide while you operate the hose. It's much easier to maintain a level surface when you have clear targets to follow.
Check your recessed light fixtures before you begin the blowing process. Only lights rated for "Insulation Contact" (IC-rated) can be safely covered by loose-fill material. If you have older non-IC lights, you must install specialized covers to maintain a safety gap. This step prevents the heat from the bulbs from starting a fire in your attic.
Safety and Ventilation Requirements
Loose-fill material creates a significant amount of dust during the installation. You must wear a full disposable suit, gloves, and a high-quality N95 respirator to protect yourself. Skin and lung irritation are common if you skip these basic precautions. Ensure your workspace is well-lit and that you only step on the joists to avoid falling through the ceiling.
The Logistics of the Blow-In Process
Place your machine on a flat, stable surface like a driveway or garage floor. You should route the hose through a window rather than the front door to keep dust out of your living areas. Test your communication with your partner before the motor starts. Since an insulation blower rental is loud, many teams use a simple tug system on the hose to signal when to stop the flow.
If you're ready to start your prep, you can rent an insulation blower from a neighbor in your local community today.
How to Use Life4Rent for Your Next Project
You can find an insulation blower rental within your own community by using the Life4Rent marketplace. This platform connects individuals who need specific tools with neighbors who already own them. It eliminates the need to visit a large retail warehouse and provides a more personal experience for your home improvement tasks.
The platform manages the rental agreement and payment process through a secure system. You don't have to worry about cash transactions or unwritten rules when you pick up the gear. Every step is documented to protect both the owner and the renter, which builds trust within the local neighborhood.
Life4Rent operates across 17 specific rental categories, making it a versatile resource for your entire home renovation. You can find everything from high-end power tools to the safety equipment required for attic work. This variety ensures that you don't have to shop at multiple locations to finish one project.
How to Find the Right Listing
Search for blowers in your immediate area to minimize travel time with heavy equipment. You should look for listings that include detailed photos and clear descriptions of the machine's condition. Read the reviews from previous users to verify that the equipment is well-maintained and performs as expected.
Check the technical specifications listed by the owner before you commit to a booking. You'll want to confirm the hose length is sufficient for your attic's height and that the power requirements match your home's outlets. Direct communication with the owner allows you to ask these questions before you finalize the agreement.
Benefits of Listing Your Own Tools
Owners can list their own insulation blowers or other specialized gear once their project is complete. This is an effective way to earn passive income from tools that would otherwise sit idle in a garage. You can offset the costs of your own renovations by helping others in your community access the tools they need.
The marketplace provides a structured way to manage these rental requests without manual tracking. Your underused equipment becomes a resource for neighbors who want to improve their home's energy efficiency. It's a practical approach to tool ownership that benefits everyone involved in the local sharing economy.
Directly messaging the owner often leads to better results than reading a standard manual. They can offer specific advice on how the machine handles different materials or share tips on the best way to route the hose. This human element makes the DIY process less intimidating for beginners.
Take Control of Your Home Energy Costs
An upgrade to your attic insulation is one of the most effective ways to lower your energy bills and meet current efficiency standards. You've seen how proper preparation, like air sealing and baffle installation, ensures your new material performs at its best. These machines make professional-level results achievable for any homeowner who can dedicate a weekend to the project.
A peer-to-peer marketplace connects you with local tool owners and provides more flexibility than traditional retail hire. Life4Rent offers a secure environment for these transactions across 17 different categories of home and professional gear. You can support your local community while accessing the high-quality machinery you need for a successful renovation.
Your effort to improve your home's thermal barrier is a practical choice that pays off every month through lower utility costs. This neighborly approach to tool sharing helps you maintain your property while keeping your budget intact. Find an insulation blower rental near you on Life4Rent today.
Frequently Asked Questions
How much does it cost to rent an insulation blower for a day?
Daily rates for an insulation blower rental vary based on your location and the platform you choose. You'll find that peer-to-peer options often provide more competitive pricing than large retail chains. These community listings usually include the machine and hose for a flat daily fee. It's best to check current listings in your neighborhood to get an accurate quote for your specific dates.
Can I transport an insulation blower in a standard car or do I need a truck?
Most residential blowers are too large for a standard sedan's trunk. You'll likely need a van, a pickup truck, or a large SUV with the rear seats folded down to move the equipment safely. These machines are heavy and bulky, so you should plan your logistics accordingly. Always check the dimensions in the tool listing before you arrive for pickup to ensure it fits in your vehicle.
How many bags of insulation can I blow in an hour with a rental machine?
A standard residential machine can typically process between 15 and 20 bags of cellulose per hour. This rate depends on how quickly your partner feeds the hopper and the density settings you've selected. You should maintain a steady rhythm to prevent the motor from straining or the hose from backing up. This speed allows a two-person team to make significant progress during a single afternoon of work.
Is it possible to blow in insulation over existing old insulation?
You can add new material over existing insulation if the old layer is dry and free of mold. This is a common way to top up an attic that has settled over time. You must remove any old insulation that shows signs of moisture damage or pest infestation first. Ensure you don't cover any eave vents or recessed lights that aren't rated for direct contact with the new material.
What electrical requirements do I need for a blow-in insulation machine?
Most machines designed for home use run on a standard 120V household outlet. You won't need specialized high-voltage wiring or industrial power sources to complete your project. It's a good idea to use a heavy-duty extension cord to ensure the motor receives consistent power without overheating. Check that the circuit you're using isn't shared with other high-draw appliances to avoid tripping your home's breakers during the process.
Do I need a license or special training to operate an insulation blower?
You don't need a professional license or formal certification to operate an insulation blower rental. These machines are built for DIY users and feature straightforward controls for the motor and air pressure. You should still read the owner's manual and wear all required safety gear, including an N95 respirator and goggles. A quick tutorial from the tool owner can also help you understand the specific quirks of their equipment.
What happens if the machine clogs during the project?
Clogs usually happen if the material is fed into the hopper too quickly or if the insulation is damp. You should stop the machine immediately and shake the hose to loosen the blockage. If that doesn't work, you may need to disconnect the hose and manually clear the obstruction. You can prevent most clogs by breaking up the compressed bales into smaller chunks before they enter the machine's agitators.
How long does it typically take to insulate a standard 1,000 sq ft attic?
It typically takes a two-person team about 4 to 6 hours to blow insulation into a 1,000 sq ft attic. This estimate assumes you've already completed the necessary preparation steps like air sealing and baffle installation. Your total time will vary based on the desired depth of the material and how accessible the attic space is. Plan for a full day to include setup, blowing, and the final cleanup.
Life4Rent
Rent it. Earn from it. Own less, access more.
Browse peer-to-peer rentals near you, or list what you own and start earning — all protected by Life4Rent Protect.
About the author
Joshua Price
Amsterdam, Netherlands
Joshua writes about the financial side of renting and earning on Life4Rent. His guides focus on helping people understand the real cost of ownership, calculate rental income potential, and make smarter decisions about buying versus renting. He previously wrote on household economics and personal budgeting for a pan-European finance publication.