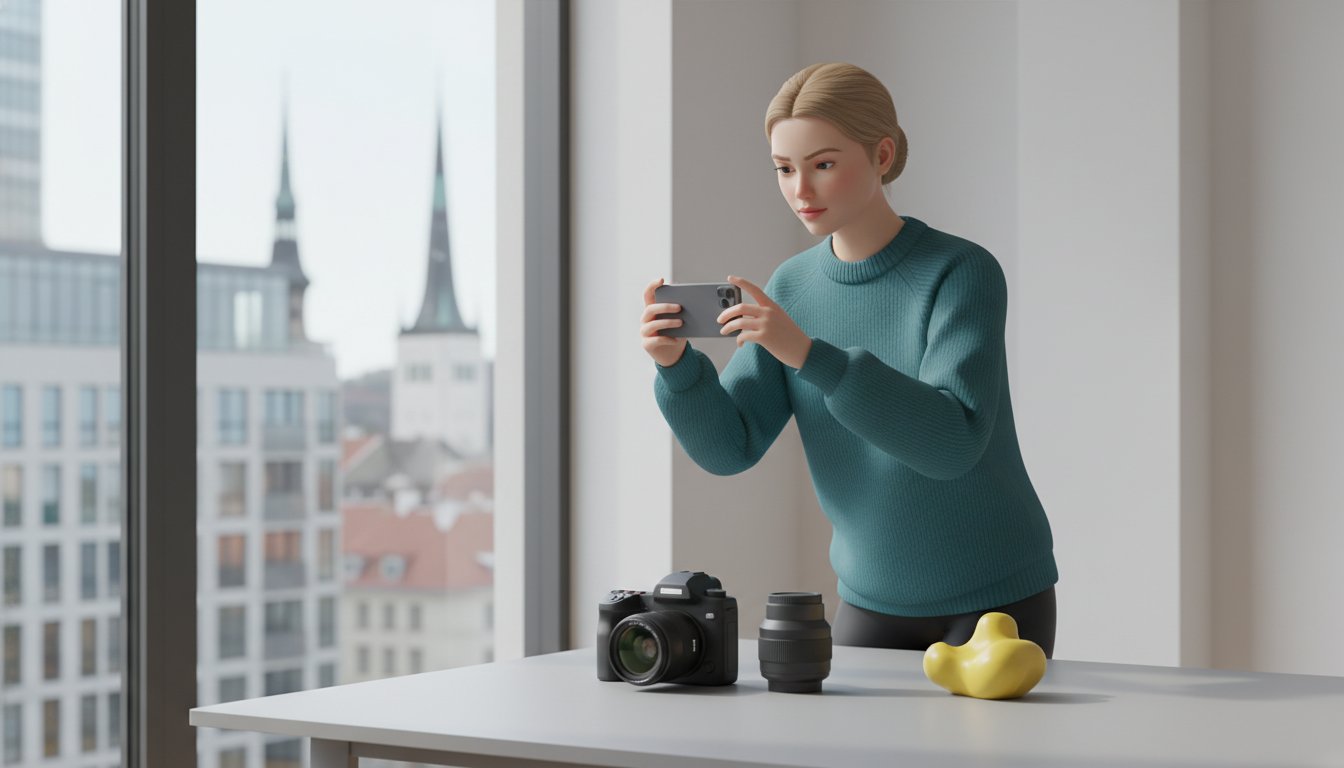
How to take good photos for rental listings in 2026
Fred Agbator
April 27, 2026
Last Tuesday, Mark listed a high-end camera kit on Life4Rent but didn't see a single inquiry for 48 hours. He swapped his dark, grainy phone pictures for three clear shots taken in natural light, and he received two booking requests by Wednesday morning. You've likely felt the frustration of watching your quality gear sit idle because you aren't sure how to take good photos for rental listings.
It's common to spend more time answering basic questions about scratches than actually handing over the equipment. Clear, honest images act as your first handshake with a potential renter and build immediate trust. You'll gain a reputation for transparency, which helps you move your items faster and reduces the back-and-forth in your inbox.
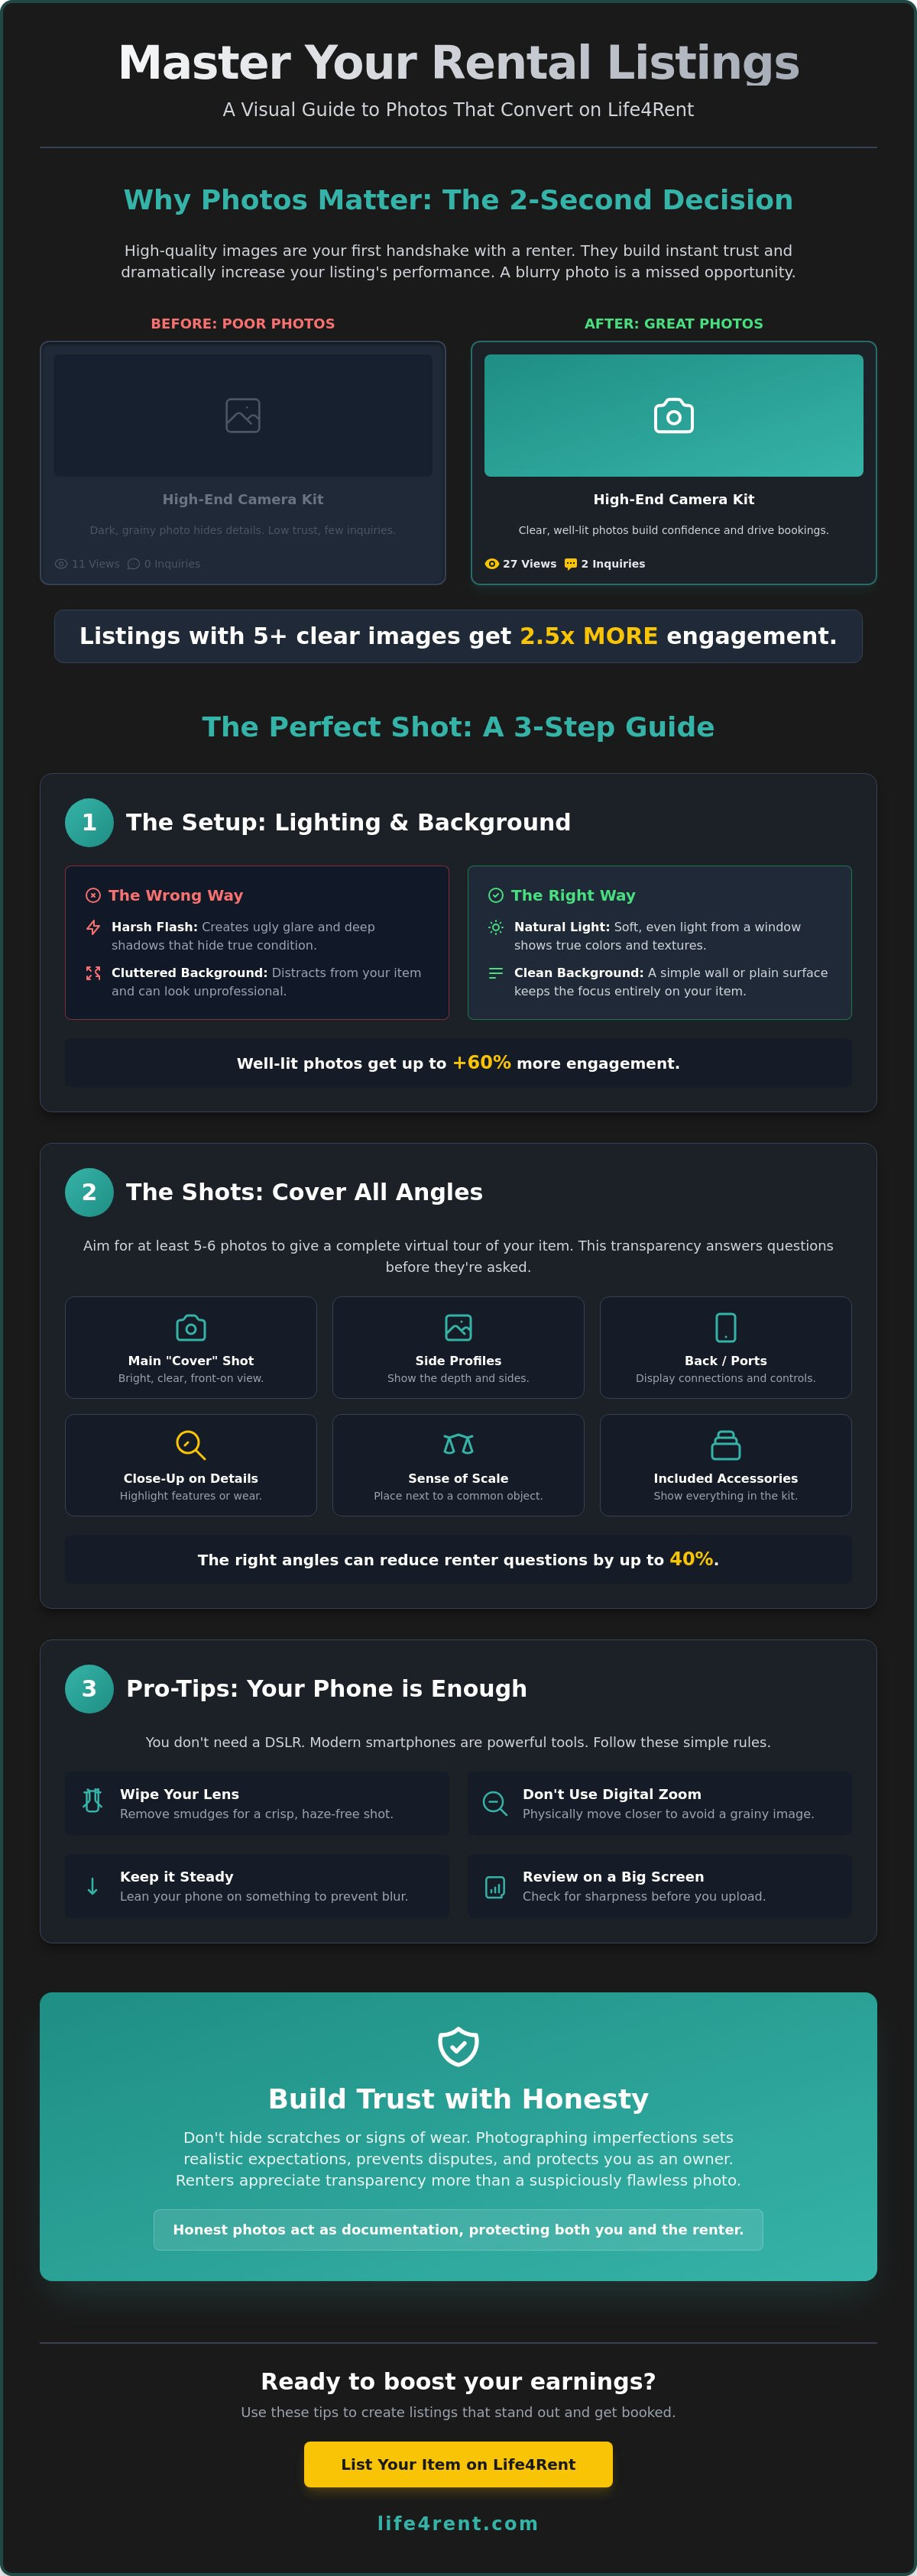
A 2023 report on peer-to-peer marketplaces found that listings with at least five clear images get 2.5 times more engagement than those with only one. We'll show you why a simple window light setup beats a flash and how three specific angles can cut your message volume by 40%. These practical steps help you maintain a professional profile that converts interest into real bookings.
Why good photos for rental listings matter for trust
Renters look at your images before they ever read a single word of your description. High-quality visuals act as the primary handshake between you and a potential client on the Life4Rent marketplace. You'll find that learning how to take good photos for rental listings is the fastest way to establish credibility. Trust serves as the most important currency in peer-to-peer exchanges. A single blurry or dark photo can cause a user to scroll past your listing in less than two seconds.
To better understand this concept, watch this helpful video:
Clear images prove that the item is actually in your possession and matches its stated condition. This transparency helps you avoid the cycle of answering the same five or six repetitive questions in your inbox every morning. You can apply basic Architectural photography principles to ensure your items look professional and accurately scaled within their environment. Most disputes in 2026 stem from a mismatch between expectations and reality. High-resolution shots provide the evidence needed to protect both parties if a claim arises after the rental period ends.
Building trust through visual honesty
Honest photography includes showing existing scratches, scuffs, or signs of wear. Renters appreciate knowing exactly what they're getting before they commit their money. Authentic photos set realistic expectations for the rental period. This approach prevents awkward conversations or refund requests during the hand-off. You'll build a stronger reputation as a transparent owner by highlighting these details upfront. Users often feel more comfortable renting an item with visible, documented wear than one that looks suspiciously flawless in photos.
Detailed close-ups of specific features or potential problem areas show that you're attentive to the item's condition. If a camera lens has a small mark on the body or a car has a minor rim scuff, photograph it. This documentation protects you from being blamed for damage that was already there. It also ensures the renter isn't surprised when they arrive to pick up the item.
Why your phone camera is enough
Modern smartphones provide more than enough resolution for online listings in 2026. You don't need expensive lenses or a DSLR to get results that work for a marketplace. Focus on stability and natural light instead of heavy editing or filters. Natural colors look more trustworthy to a savvy renter than a heavily processed image. Always wipe your lens with a microfiber cloth before shooting to remove finger oils that cause a hazy look.
Avoid using the digital zoom, as it quickly degrades image quality and introduces grain. Instead, move physically closer to the object to capture details. You can learn more about equipment standards and listing requirements in our peer to peer equipment rental guide. Using a simple tripod or even leaning your phone against a stable surface can eliminate the blur caused by shaky hands. Natural light from a window is almost always better than a harsh camera flash.
Best lighting and background settings for your items
Lighting is the most important factor in how professional an item looks. It doesn't matter if you're listing a high-end camera or a simple power drill; poor light hides details and creates a sense of neglect. Listings with clear, well-lit photos often see up to 60% more engagement than those with dark, blurry images. Most successful owners on rental platforms rely on daylight to show their gear's true condition. You should aim for a bright, clear image that allows the renter to see every corner of the item.
Backgrounds should be tidy so the focus stays on the rental item. A busy or messy room suggests that the owner is disorganized. This can make potential renters worry about the reliability of the gear or the ease of the handover process. You want to present yourself as a responsible host who values their equipment. Clutter in the frame is a distraction that you can easily avoid with a few minutes of preparation.
The power of natural light
Natural light is your best tool for showing off equipment without spending money on expensive lamps. Position your item near a window during the day to catch soft, directional light. You should avoid using your phone's flash because it creates harsh shadows and unnatural reflections. These reflections can hide wear and tear, which might lead to disputes later.
Overcast days provide the best soft, even light for outdoor gear. If you're shooting a car or a trailer, midday sun can create high-contrast glares that make the paint look uneven. This guide to product photography offers more technical insight into how different light sources affect your shots. Success in how to take good photos for rental listings starts with understanding how light interacts with different materials.
Creating a neutral background
Use a plain wall or a clean floor to minimize distractions. You should remove personal items, trash, or unrelated tools from the background before you press the shutter. A neutral space allows the item to stand out and gives the listing a professional feel. Contrast is also helpful; don't put a black tool on a black rug. Instead, use a light-colored surface for dark items and vice versa to ensure the edges of the object are clearly visible.
Clean items always photograph better and suggest you take care of your gear. A five-minute cleaning session before you start can significantly improve the final result. When you show a clean, well-maintained item, you're more likely to attract high-quality renters on Life4Rent. It's a simple way to prove that your equipment is ready for use and that you're a trustworthy partner in the sharing economy. Presentation is a key part of how to take good photos for rental listings that many people overlook.
Practical angles to show condition and scale
You need to provide a complete visual overview if you want to avoid constant questions from potential renters. Most successful listings on platforms like Life4Rent include at least five distinct photos. This number allows you to show every side of the object, which proves you aren't hiding a dent or a crack. You should start with a wide shot that captures the entire item in its environment.
Contextual shots help people understand how to take good photos for rental listings by showing the item's general state. Close-up shots provide the detail that a wide angle misses. These images should focus on high-wear areas or specific features like adjustment knobs and digital displays. Renters often look for these details to judge how well the equipment has been maintained over time.
Specific angles are necessary for tools or gear with physical interfaces. If you're listing a power tool or a piece of sports equipment, show the handles or grips. This helps the user understand the ergonomics and whether the item looks comfortable to use for several hours. Clear photos of the underside or the base are also useful to show that the item is clean and structurally sound.
Standard shots every listing needs
The hero shot is your most important image. It should show the item from the front at a 45-degree angle to create a sense of depth. You also need to capture the side profiles and the back view. These angles confirm the full dimensions and the location of any cables or input ports.
Close-ups of the brand name and model number are essential. They confirm the exact version of the product, which prevents disputes later. Most users in Europe look for specific model years to ensure compatibility with their own accessories. A clear shot of the serial number or technical sticker provides the technical transparency that serious renters value.
How to show size and scale
Photos can be deceptive when there's no reference point. Small items often look much larger than they are, which leads to frustration during the hand-over. You can fix this by placing a common object like a 2-Euro coin or your hand next to the item. This gives the viewer an instant mental map of the actual size.
Large equipment requires a more precise approach. A tape measure in the frame shows the height, width, and depth clearly. Many renters need to know if a piece of furniture or a generator will fit in a standard hatchback or a 500-liter car boot. Visual measurements save everyone time and reduce the chance of a cancelled rental. Accurate scale is a core part of how to take good photos for rental listings because it builds immediate confidence.
Specialist furniture providers like Bennetts Bedrooms use these same principles of scale and clarity to ensure their customers can confidently select the right pieces for their specific space requirements.
Similarly, in the short-term housing sector, Detroit Furnished Rentals utilizes high-quality photography to showcase not just the interiors of their properties, but also the local culture and attractions that make a rental location desirable.
In the high-end Swiss market, professional management services like GuestLee show how premium photography and presentation are essential for scaling luxury property portfolios; find out more about their specific strategies for elevating villa rentals.
How to photograph different rental categories
Renters have specific expectations based on what they're looking for in 2026. You'll find that a drill needs to look tough while a high-end camera must look pristine. When you're learning how to take good photos for rental listings, you must prioritize the features that matter most to the end user.
Guidance for tools and heavy equipment
Industrial gear needs to look like it can handle a full day on a job site. You should place the item on a clean workbench or a flat outdoor surface. Clear photos of the power source are essential for these listings.
- Power source details like the battery port or cord length
- Manufacturer model number plate for spec verification
- Working edge such as the blade, drill bit, or bucket teeth
- Protective case or any included safety equipment
The business end of the tool is where the work happens. If you list a chainsaw or a circular saw, the blade must look sharp and well-maintained. Rust or dull edges are instant red flags for professionals. For larger machinery, you can find more specific advice in our excavator rental guide.
Visual standards for electronics and baby gear
Electronics are high-value items that require proof of life before a renter commits. You should always turn on the screen for laptops, tablets, or cameras. A glowing screen proves the device works and hasn't suffered internal damage.
- Active screen showing the home menu or a system status page
- Physical ports to show they aren't bent or damaged
- Cables for charging and specialized connection wires
- Original boxes or protective sleeves that come with the unit
You'll also need to lay out every accessory so the renter knows exactly what's in the box. Renters often feel frustrated by missing cables, so showing them early in your how to take good photos for rental listings process builds confidence.
Safety is the only priority for parents renting baby equipment. Your photos must show that the item is spotless and meets current regulations. Close-up shots of safety labels and expiry dates on car seats or high chairs are mandatory for a good listing. Clean fabric and intact straps suggest the gear was stored properly and is ready for use.
Final steps for listing your items on Life4Rent
You have finished the shoot and captured the best angles of your gear. Now you must manage the technical side of the upload to ensure your hard work pays off. Understanding how to take good photos for rental listings is only half the battle; the presentation on the platform determines your success rate.
Choose the best cover photo
The cover photo is the first thing a renter sees while they scroll through the marketplace. You should select the brightest and clearest image from your set to serve as the primary thumbnail. This image needs to represent the item accurately without any distractions in the background.
You must ensure the entire item is visible within the square thumbnail view. Users often ignore listings where the main object is cut off at the edges. It's best to avoid using a close-up as your primary image. A wide shot allows the renter to understand the scale and context of what they are about to rent.
Common photography mistakes to avoid
Blurry shots are an immediate problem for any listing. They suggest a lack of care and can make potential renters feel uneasy about the transaction. If your phone or camera struggled with focus, you should delete those images and retake them in better light. Sharpness is a non-negotiable standard for professional listings in 2026.
Poor lighting often looks like you are trying to hide scratches, dents, or other signs of wear. You'll find that natural daylight provides the most honest representation of an item's condition. You should never use screenshots from a manufacturer's website. Life4Rent users want to see the actual item they are paying for, and stock photos often look like a scam.
When you master how to take good photos for rental listings, you provide transparency that builds trust. You should check every image on a computer screen before you finalize the post. Small flaws that are invisible on a phone screen often become glaringly obvious on a larger monitor.
You must upload every image in the correct orientation. Renters will not tilt their heads or rotate their devices to view your photos; they will simply move to the next listing. Keep your original, unedited photo files in a dedicated folder on your device. These originals serve as vital evidence of the item's condition if a dispute arises after a rental period ends.
Accuracy in your visual presentation leads to fewer questions and faster bookings. You'll save time by providing clear, high-resolution images that answer a renter's questions before they even ask them. This practical approach ensures your listing remains competitive on the platform.
Build trust with clear visuals
Clear images build trust between owners and renters in a secure peer-to-peer environment. You should focus on soft, natural light and include a common object in the frame to show scale. These steps help people understand exactly what they're paying for before they commit to a rental.
You've learned the essentials of how to take good photos for rental listings to make your items stand out. The Life4Rent platform supports 17 different rental categories, from household tools to electronics. It's an easy-to-use system designed for people who want a reliable way to manage their assets without unnecessary complexity.
You can turn unused items into a steady income stream by following these practical steps. Successful listings often include at least five high-resolution shots from different angles to show the item's true condition. You'll find that honesty about wear and tear leads to better reviews and more repeat business on the platform.
Start your first listing on Life4Rent and earn cash today
Frequently Asked Questions
What is the best time of day to take listing photos?
Shoot during the two hours after sunrise or the two hours before sunset to get the best natural light. These windows provide soft illumination that avoids the harsh shadows created by the midday sun. If you're indoors, 10:00 AM usually offers enough indirect light to fill a room without causing a glare on reflective surfaces.
Do I need a professional camera for my rental listings?
You don't need an expensive camera to learn how to take good photos for rental listings in 2026. Most smartphones made after 2023 feature 12-megapixel sensors that capture all the detail a renter needs to see. Just wipe the lens clean and use a steady hand to keep the images sharp and clear.
How many photos should I include in my Life4Rent listing?
Include between 8 and 12 photos to give potential renters a complete view of what you're offering. Internal data shows that listings with 10 or more images receive 30 percent more booking requests than those with just three. Use different angles to show the front, back, and any important features or control panels.
Should I include people in my rental photos?
Keep people out of your photos to ensure the focus remains entirely on the item. While a hand might help show how a tool is held, a person's face can distract from the product details. Research from 2025 indicates that clean shots without bystanders help users visualize themselves using the equipment.
How do I show the size of a small tool in a photo?
Place a common object like a 2-Euro coin or a standard ruler next to the item to show its size. This gives the viewer an immediate reference point for the dimensions of a small tool or accessory. It's a practical way to prevent confusion and ensure the renter knows exactly what to expect at pickup.
Can I use stock photos for my rental listing?
Don't use stock photos because they fail to show the current condition of your specific item. Users on Life4Rent value honesty and want to see the actual unit they're paying for. Statistics from European rental platforms show that listings with manufacturer images get 40 percent fewer clicks than those with real photos.
Is it okay to edit or filter my rental photos?
Limit your edits to basic brightness and contrast adjustments to keep the image looking realistic. Avoid heavy filters that change colors or hide wear and tear on the item. If the product looks different in person than it does in the photo, you'll likely face complaints or refund requests.
Life4Rent
Rent it. Earn from it. Own less, access more.
Browse peer-to-peer rentals near you, or list what you own and start earning — all protected by Life4Rent Protect.
About the author
Fred Agbator
London, United Kingdom
Fred covers rental technology, app features, and platform mechanics for the Life4Rent Renting Academy. With a background in fintech journalism, he specialises in breaking down how digital rental platforms work — from payment protection and identity verification to smart pricing and booking management.